Alternatively, click here.
Thursday 9 May 2013
Wednesday 8 May 2013
Monday 29 April 2013
Monday 22 April 2013
Evaluation Plan
We have selected a couple questions each to tackle and we will then combine them into Prezi as this will ensure our presentation is media rich and will keep the audience interested.

Another advantage of using Prezi as our presentation tool is that all 3 of us can access the same account at once therefore this will be time efficient.
Evaluation Questions
1. In what ways does your film opening use, develop or challenge forms and conventions of real film openings?
2. How does your film opening represent particular social groups?
3. What kind of media institution might distribute your film opening and why?
4. Who would be the audience for your film opening?
5. How did you attract/address your audience?
6. What have you learnt about technologies from the process of constructing this product?
7. Looking back at your preliminary task (the continuity editing task), what do you feel you have learnt in the progression from it to full product?
Sunday 21 April 2013
Post Production: Sound
Music and sound effects is vital in horror films as I found out in my earlier research. We have found a copyright free track from http://www.purple-planet.com/ This track is effective in our opening as it has a childlike ring to it, suggesting connotations such as the victim being to young to die. Also we have matched the beginning of the ringing with the start of the clips of the woods which proved to work very well. Below is the sound track we used for the beginning of our opening.
The next music clip we use is from http://incompetech.com for the rest of the planned storyboard.It has a slow, eerie, electronic feel to it which is great for the sequence of clips of them walking and coming across confusing and suspicious things. Much more of an impact is made in terms of the events occurring and the suspense is built.
We put the audio from the video of the iPhone over the top so that it is clearer to hear the sound also it makes it clearer to the audience why they are startled. The laughter in the background makes the scene a lot more creepy, also it allows the audience to establish the character as 'Josh' and the person who is a victim.
Sound effects we used include a typewriter, a bang and a rustle in the bushes. This enhances things that occur in our opening and make everything more dramatic.
Saturday 20 April 2013
Post Production: Adding Titles
To ensure our opening looks like an opening, it is essential to include titles. To help with this, I looked back at my my previous blog post about Art of the Title. In that blog post I had incorporated images from footage which reminded me how I liked the style of Se7ens opening titles.
Finding the right font is important. At first, this was proving a difficult task as on Final Cut to look at each font you have to individually click on each one to preview it. Fortunately we found an application called 'Font Book' in which we could look through all the fonts quickly and easily until we found one we thought would fit in with our opening. We chose 'Courier New' as it reflects a technological feel which fits in with our film as it revolves around an iPhone.

To make a title, go into the 'Effects' tab then go into 'Video generators' and then 'Text' you will then be able to type in your title and alter the font. Here is a preview of one of our titles. If you then want to reposition your title, click a box in the canvas area and select 'Image+Wireframe' this allows you to drag your title to wherever you desire it to be.

Also I feel it is important to get the right duration of each title so that the audience don't become uninterested. Therefore to change the duration, right click on the clip you would like to change and click on duration. A box will pop up, as show below which will allow you to then decide how long you want the clip to be.

Some titles were placed over the top of other clips. This is done by simply dragging your title above the selected clip.
We chose to add some effects to the text so that not all of them were completely static as with added effects our titles looked a lot more effective and interesting. To do so, firstly go into the 'Effects' tab, then into 'Video Filters' and then look through what style you would like to add. We chose to go into 'Distort' and then selected 'Earthquake' to add a disorientated feel.

To add this to your selected title drag it on top of the clip in the sequence below.

For our final title of 'iWatch', we thought that having the simple effect that the other titles wasn't effective enough in communicating to the audience what the rest of the film has in store for them. Therefore we linked in the theme of being watched and recorded into the title. As you can see below, this looks a lot more interesting. Plus we then added an effect to make the background shake.

Friday 19 April 2013
Post Production: Editing Extra Footage
Next we added in some extra footage that was not initially planned in the first stages of planning our opening. This included clips of running through the woods and even seeing a dark figure. I added these clips at the beginning to convey to the audience that this is a horror film and to create suspense.


Then we decided that to make the scenes more horrifying we would change them from colour to black and white. To do this scroll across the top to 'Effects' then to 'Video Filters' next to 'Image Control' and finally click 'Desaturate' make sure to do this for each clip you desire to be altered.

The other clips were of a hand crossing out the victims face in pictures with his friends. We included jigsaw pieces around the area and a swaying light as an effective part of mise en scene. Some examples of these clips are below. We added these in between three similar clips of extreme close ups involving facial features This would signify to the audience that these are previous events that have occurred and reflection of these character may be occurring due to their friends death.

Post Producion: Editing Main Footage
We have now begun our editing process. To begin we created a rough edit of our main footage by simply, cutting and placing the clips in the right order according to our storyboard. Below is the result of this.

Whilst editing red lines will appear above your sequence, this means you need to render your footage.

To do so, scroll over the 'Sequence' tab at the the top and then click 'Render'

Footage needs to be rendered when it is altered therefore it is usually best if you render after a few steps as otherwise rendering may take quite a while.

A technique I used in some clips was altering the speed to slow it down. This can create a more dramatic and emotional feel. Also if it is cut next to another clip which is much faster, a comparison is made and tension can be created. First of all, scroll over 'Modify' up the top and the click on 'Speed...'.

Next this box will appear, in which you can reduce the speed from 100 percent to a lower number for it to be slower or increase the number for it to become faster. Also here you can reverse a clip by ticking the tick box next to 'Reverse' this can give a disorientating feel if put back to back with the original clip, like we have done in the start of our opening with the trees.

Wednesday 3 April 2013
Post Production: Importing Footage
To import footage, first of all remove the SD card from the camera and place it into the Mac. Then iPhoto will pop up showing the clips. Select the clips you would like to import and click 'Import Selected' or if you want all the clips then simply click 'Import All'. Below is our footage in the process of being imported.
Once the footage has imported it will ask if you want to keep the photos. It is best to click 'Keep Photos' so that you can see more clearly what is involved in each clip when editing. As shown below.
Next drag the imported footage from iPhoto onto the desktop. This ensures that your footage is saved. I then made the decision to make a folder with all the footage in to keep the desktop tidier.
After that, open up Final Cut Express and drag the footage into the browser window. The footage is now ready to be edited. Remember to save your project at this point.

 |
 |
 |

Monday 25 March 2013
Post Production: Second Take
We have had to postpone our re-film several times due to our cast members having other events to attend and unexpected heavy snow. The weather conditions were not suitable to film as there would be footprints in the snow and this would not convey a secluded location like we had planned for our opening.
Update: We have no re-filmed which has resulted in much better footage. Now we can begin the construction process.
Update: We have no re-filmed which has resulted in much better footage. Now we can begin the construction process.
Monday 4 March 2013
Post Production: First Take
When looking through our footage of the first take, we have noticed a few flaws amongst our work.
 |
| A bag could be seen in the distance which does not fit in with the location being secluded. Therefore this clip would not be as effective. |
 |
| Holeigh's feet can be seen here. This meant that to make the clip work it had to be cut short in editing and ended up looking rushed. |
 |
| In numerous clips the tripod can be seen in the background when we are at this angle. This results in the clips not being realistic and effective. Also even when cut short in editing it does not work as well as we would of hoped. |
 |
| Another fault was that the camera we used was on auto-exposure. Therefore the lighting changed frequently throughout and picked up on aspects that did not need to be. For example, the two clips above are consecutive yet have completely different lightening. |
 |
| Despite these technical difficulties we managed to construct a rough edit. |
We decided some parts did not look how we initially wanted them too. For example there is a clip showing each of the friends emotions through extreme close ups, what has gone on is not clear to the audience and it does not look very effective. From this we came up with the idea of adding in clips of a newspaper article of Josh's death and pictures of Josh looking happy being crossed out. This would create a sense of tension and make it clearer to the audience to what the film is about. Also we feel the 'person' watching the friends needs to play more of a role in the opening. Therefore we are going to add in some footage of the friends through the trees and running away through woodlands with the camera. This will make the whole thing seem more creepy. With all this took into account, the faults mentioned above and the rough edit only being roughly one minute long, we are going to re-film.
Production: Filming
Today we got the footage for our opening. We worked well as a group and the chosen actors/actresses were very cooperative. Soon we will begin looking over our footage and making choices upon editing in post-production.
 |
| Sorting out the mise en scene was vital in our opening. |
 |
| The tripod was set up for some shots. |
 |
| We agreed to do some shots without the tripod. |
 |
| The hand held effect would be more effective in our opening. |
 |
| We were very pleased with our actors/actresses. |
Sunday 3 February 2013
Planning: Shot List
Below is a list of all the types of camera shots that will be used in our opening and a summary of what will happen in them. This helps us to clearly show what should be happening in each clip without going into too much detail.
Shot 2: ELS - The 3 friends begin walking towards Josh's memorial.
Shot 3: LS - The 3 friends reach Josh's memorial.
Shot 4: LS - A friend places the picture frame down.
Shot 5: CU - The objects at Josh's memorial are shown in more detail.
Shot 6: CU - A match is lit.
Shot 7: LS - The candle is lit and placed down.
Shot 8: ECU - Eye.
Shot 9: ECU - Nose.
Shot 10: ECU - Mouth.
Shot 11: LS - Friends walk over to where Josh's voice is coming from.
Shot 12: CU - iPhone is picked up.
Shot 13: OSS - Video of Josh at a party is watched.
Shot 14: MS - Friends look startled when they hear a sudden noise.
Shot 15: LS - Friends rush back over to Josh's memorial.
Shot 16: CU - The damaged objects are shown in detail.
Shot 17: MS - Their facial expressions are shown to portray feelings.
Shot 18: ELS - The friends are being 'watched' through the trees.
ELS = Extreme long shot
LS = Long shot
MS = Mid shot
CU = Close up
ECU = Extreme close up
OSS = Over the shoulder shot
Shot 1: ELS - Establishing the secluded field as the location.Shot 2: ELS - The 3 friends begin walking towards Josh's memorial.
Shot 3: LS - The 3 friends reach Josh's memorial.
Shot 4: LS - A friend places the picture frame down.
Shot 5: CU - The objects at Josh's memorial are shown in more detail.
Shot 6: CU - A match is lit.
Shot 7: LS - The candle is lit and placed down.
Shot 8: ECU - Eye.
Shot 9: ECU - Nose.
Shot 10: ECU - Mouth.
Shot 11: LS - Friends walk over to where Josh's voice is coming from.
Shot 12: CU - iPhone is picked up.
Shot 13: OSS - Video of Josh at a party is watched.
Shot 14: MS - Friends look startled when they hear a sudden noise.
Shot 15: LS - Friends rush back over to Josh's memorial.
Shot 16: CU - The damaged objects are shown in detail.
Shot 17: MS - Their facial expressions are shown to portray feelings.
Shot 18: ELS - The friends are being 'watched' through the trees.
Saturday 2 February 2013
Planning: Storyboard for Opening
Below is our finished storyboard for our opening of iWatch. We will be using this in the filming process to help with camera shots, angles and movement as well as what is actually happening within each clip.
Edit: Before the start of the sequence show in the storyboard we plan on adding in clips of the woods to create suspense. Also in the middle of clips 8,9 and 10 we will add in some extra clips that make our opening more effective in the horror genre.


Edit: Before the start of the sequence show in the storyboard we plan on adding in clips of the woods to create suspense. Also in the middle of clips 8,9 and 10 we will add in some extra clips that make our opening more effective in the horror genre.


Thursday 31 January 2013
Planning: Mise-en-Scene for Opening
Costume
Friend 1 (Lisa): Casual wear with a slight tomboy feel. Rough guidelines would be a jumper, jeans and trainers.
Friend 2 (Ellie): Casual wear however a more feminine approach would be good to portray her personality contrasting to the other female character. The outfit could include a top, jacket, jeans and dolly shoes.
Friend 3 (Tom): Casual wear with a bit of an edge. For example a plain t-shirt, jacket and trainers.
Josh (Deet): For this task Josh is only needed in a photograph with the other friends. This will be taken at sixth form therefore he should be attired in appropriate business wear.
Props
Flowers: To show that Josh has passed away and to make it clear to the audience it is a memorial.
Photograph (Josh): To show the audience who the victim was.
Photograph (Group of friends): Showing how close the group was and to signal that the friends could be the next victims.
Photo frames: For finishing touches and to make it seem more realistic.
Candle & Matches: As a sign of respect for Josh and to make the scene more realistic.
iPhone: To modernise our film.
Video: A video of Josh at a party, on the iPhone to fit in with the plot.
iPhone: To modernise our film.
Video: A video of Josh at a party, on the iPhone to fit in with the plot.
Tuesday 29 January 2013
Planning: Casting for Opening
We need to decide upon the casting members for our opening of iWatch. Below are some possible actors and actresses.
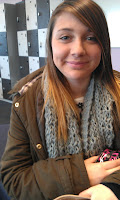 Ellie Spence: Did well in GCSE drama and is currently studying as level drama meaning she will have no issues with acting in our opening. Also she studies as level media studies meaning she is more aware of how the filming process works. She has confirmed she will be available on our filming date.
 Keely Raynor: Did well in GCSE drama and is more than happy to play the role in our opening.
Friend 2: Female
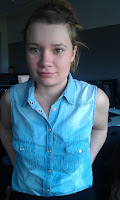
 Lisa Eady: Studied GCSE drama and has took it further to as level. Also she played the main part in our preliminary task and proved she can do well as an actress and can take our directions and act upon them to improve. She has confirmed she will be available when we film.
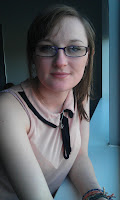
Mariella Ralph: Is an option for our opening as she would look the part as the girly friend. She did well in drama earlier on in school however she did not take it any further. Therefore she has basic acting abilities.
 George Hopkins: Took GCSE drama and is currently studying drama and media studies at as level. Therefore he will have a full understanding of filming and acting.
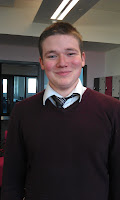
 Tom Bates: Did well in GCSE drama and would fit in well with the part for our opening. He has confirmed he can make it to film.
Josh (Victim): Male
 Deet Bains: Is currently studying media studies therefore he understands the concept of filming for our opening. Also this part require little acting experience.
 Akhil Varghese Shibu: Is a sixth former that does art as an a level showing he has a creative side which is something that will be useful in acting in our opening.
After deliberating the positives and negatives of each possibility, we came to the final decisions. We have chosen Ellie as Friend 1, Lisa as Friend 2, Tom as Friend 3 and Deet as Josh.
Friend 1: Female
 Ellie Spence: Did well in GCSE drama and is currently studying as level drama meaning she will have no issues with acting in our opening. Also she studies as level media studies meaning she is more aware of how the filming process works. She has confirmed she will be available on our filming date.
  Keely Raynor: Did well in GCSE drama and is more than happy to play the role in our opening.
Friend 2: Female
 Lisa Eady: Studied GCSE drama and has took it further to as level. Also she played the main part in our preliminary task and proved she can do well as an actress and can take our directions and act upon them to improve. She has confirmed she will be available when we film.
Mariella Ralph: Is an option for our opening as she would look the part as the girly friend. She did well in drama earlier on in school however she did not take it any further. Therefore she has basic acting abilities.
Friend 3: Male
 George Hopkins: Took GCSE drama and is currently studying drama and media studies at as level. Therefore he will have a full understanding of filming and acting.
Josh (Victim): Male


Final Decisions
Monday 28 January 2013
Planning: Action Plan
We are creating an action plan to make sure we are prepared to do our filming. Our filming date is Sunday the 10th of February.
Now we have decided upon this date we can make sure we are ready to film by then. We must get our storyboard, casting and mise-en-scene done by Sunday the 3rd of February. We then need to book out a tripod and we will be using two of our own cameras. Also an extra camera will be used to take shots of the filming process. In terms of props I will be in charge of getting flowers and the photographs, Holeigh will be in charge of getting the photo frames and providing the iPhone and Tayla will be in charge of getting the candle and matches.
Edit: Due to weather conditions we felt that our opening would not be as effective with snow. The location may not look secluded due to footprints left in the snow and our planned costume would not be suitable for the cold. Therefore we decided to postpone our filming date to Saturday the 16th of February.
Edit: Due to weather conditions we felt that our opening would not be as effective with snow. The location may not look secluded due to footprints left in the snow and our planned costume would not be suitable for the cold. Therefore we decided to postpone our filming date to Saturday the 16th of February.
Subscribe to:
Posts (Atom)